
 Step 1. I used 2 flourish masks from this set of glimmer screens.
Attach them to one side of the paper using spray mount. It's a good idea to 'felt' this before use by pressing against your clothes, so they stick to the paper , but come off easily.
 Step 2 use a small piece of sponge to pick up ink (I used Stampin' Up Close to cocoa) and move this over the stencils. If they are fairly well stuck you can do this with a circular motion.
 Step 3. Remove the stencil as you go, and move to another part of the paper. Eventually the whole sheet will be covered with the ink and the stencilled images.

Step 4. Use a contrasting colour of ink (Stampin' Up Ruby Red) and a sponge to ink the edges of the paper, make sure the table is covered here... thank God for the Coventry Evening Telegraph. :)
 Step 5. Now for the stamping....The stamp i used is one i picked up at a bargain half price in a Nuneaton craft shop, it was perfect for the theme of this page, so i had to have it! Stamp from the Tim Holtz collection, brown ink as before.
 Step 6. Ink up the ink pad, stamp off onto scrap paper first ( so the image is not to bold when you add it to the paper) and then randomly onto the paper, stamp off the edges too.
 Step 7. Now for some shine! Using Cosmic shimmer (you could use glimmer mists as well, or a mica paint in a spray bottle)
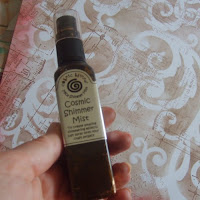
spray off onto scrap first...
 Then lightly over the paper. About 2-3 squirts at a height of about 2 feet should do the trick.. Again make sure the table is covered, some crafters do this spraying inside a large cardboard box.. worth a try if you have one handy!.
Step 8 If you are impatient you can dry it with a heat gun. If the paper curls once dry then weigh it down, or just do what i did, use it straight away, and glue it to some cardstock, it soon sits straight!
 The paper looks better IRL, the shimmer spray makes all the difference!
So what did i use my paper for?.....
Here is th e LO i made with this paper. As you can see from the journalling, the stamp is ideal for the subject of my page. My Aunty Joan is still with us (and as feisty as ever!) this picture was taken of her before she married (i think!) in the late 1950s. Dress made by herself!
Other materials i used were DCWV cardstock, flower s, Prima and papermania, brads papermania, Thickers alphabet and frame, Bazzil stitching template, MSE alphabet stamps, journalling stamp.
10 comments:
This is so fantastic, Im well impressed. You are a very talented lady.
Ann, this is gorgeous, I have the Tim Holtz Masks and will be having a go at this technique myself.
This is beautiful, love how you have customised the papers for your LO
Best Wishes, Kit x
A brilliant tutorial Ann, thank you! Your finished page is fabulous and how wonderful to know that you made your background paper yourself!
Sue x
Right, I have (as yet) unused masks and a big pile of distress inks which I am determined to get to grips with over the Easter holidays - so this was super timing, thanks! Nice, easy to follow tutorial, and an absolutely beautiful layout. Well done!
I love this and I soooooooooo need that stamp, it is gorgeous!
Wow what a fab layout and thank you for showing us how to use the shimmer mist and masks. My husband wont be happy when I tell him I need these things but never mind it will be worth it LOL.
A fabulous LO and a brilliant tutorial - Thank you
Bloomin' great tutorial and lovely LO to as well, just lovely. What I wanna know is..did you make the paper knowing what you were going to use it for? And if so, how come I can't plan properly like that??!
Yes i did..sort of! i've had the photo of my Aunt who was a seamstress for a while, so when i saw the stamp on offer i knew that's what i would use it for!
Post a Comment