
 -thing, for street parties, birthdays and bank holidays, a few flags fluttering in the breeze seem to be an absolute requirement. I saw some cute bunting in a shop in Leicestershire earlier in the week, but it was pricey, and would only really suit the royal wedding on Friday, so I decided (with some encouragement from my eldest daughter) to make my own.
So if you would like to have a go at making your own multi-purpose, double sided bunting, then take a look at how I did it below!!
Supplies
Ging
 ham Fat quarters.
I bought a set on offer in Hobbycraft as It meant I didn't have to worry about wrong and right sides to the fabric, and they gave me 2 colour themes to use, one red
 , white and blue for an up coming wedding, the other pink, green and yellow for spring or general use.
White bias binding (wide, 7m)
A4 card
Pencil and ruler
Pins
Sewing machine
Pinking shears and dressmaking scissors.
Thread; red and white
Step 1; Making the template.
Unfold the fat quarter into a rectangle with 4 layers. (a)
Take the card, fold in half at the bottom only to find the mid point, then use a ruler to draw a line parallel with the bottom of the card, and mark the mid point.(c)


Next, draw lines from the mid point to the top corners of the card on the left and right to form a triangle. Cut out the card and you have your template.
Step 2. Pinning and cutting.
Place the template onto the folded fabric, with the raw edge at the bottom, pin in place. (f) Cut down the edges with pinking shears, (g) try to match the pattern up as you go for a neater finish. The top of the flags can be cut using ordinary dressmaking scissors.

 Do this for all the colours you require. I cut out red and two shades of blue for one side of the bunting, and the spring colours for the other side.
Once you have cut out you will notice that 2 of the folded edges also form triangles (j) and when you unfold these (k) they make 2 extra flags. Each fat quarter will give you 6 flags. 
 Step 3; Sewing the flags.
Pin contrasting flags wrong sides together with one of each colour choice on each side ie; red, white and blue for one side, spring colours on the other. If you want to turn your flags so they have neat edges (I didn't, I just left the pinked edges and stitching showing) pin them right side together. Then use the machine to stitch them down each pinked side only. I used red thread for the red, white and blue side of the bunting (the top of the sewing) and white for the underside pastel flags (fill the bobbin with white).
Step 4 Make up the bunting.
Cut 3.5 m of bias  binding, and start to put the top of the flags inside the binding (v) after leaving 40cm at the ends for tying onto things. Leave 11cm between each flag, fold over the binding and pin the whole length. (x) Make sure your flags are on the right side (ie all the red white and blue facing the same way). Stitch along the bias binding (I us
 ed zig zag, you could use straight or a decorative stitch if you have a fancier sewing machine than mine!)
Step 5 Finishing off
If your bunting flags don't match exactly, and one side overhangs a little, you can trim them once they are made using pinking shears. Press your bunting, tie it up and then enjoy! 

 I used the DCWV Green Stack to make my flowers (I saw a LO made with this a day or so ago, and it reminded me how much i liked it!
 The flowers are also a really good way of using up scraps of paper from the same kit.


 Step 5. Then use the smaller circle to draw around, again cut out 5mm inside the line and so on, until you have as many circles as you want. I tend to make my flowers with odd numbers, 5 layers for a larger flower, 3 for a smaller one.


 I was puzzling over what to get my sister for her birthday next week, when i saw these canvases at the knock down price of £1.99 in The Range last week. I had an idea of what to do with them, and after a lot of effort (and very inky fingers....!)


 I hope she likes it!


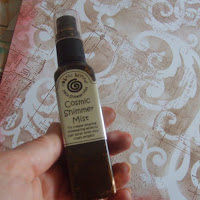
 Then lightly over the paper. About 2-3 squirts at a height of about 2 feet should do the trick.. Again make sure the table is covered, some crafters do this spraying inside a large cardboard box.. worth a try if you have one handy!.
 If the paper curls once dry then weigh it down, or just do what i did, use it straight away, and glue it to some cardstock, it soon sits straight!
 The paper looks better IRL, the shimmer spray makes all the difference!


