Showing posts with label Tim Holtz. Show all posts

Saturday, 12 January 2019

This Year's card

I always like this page that includes one of my cards from the year.  As I make my own, it is interesting to compare the different cards I have made over the years. 


I bought a lovely new Tim Holtz die of the three kings, and used it to make the card I included.


Including the whole card is handy as I can include my journalling inside. The papers are by Sizzix, title Paige Evans Thickers (love these) and the tiny sentiment stamp is embossed in white, by Simon Say Stamp.

Tuesday, 18 September 2018

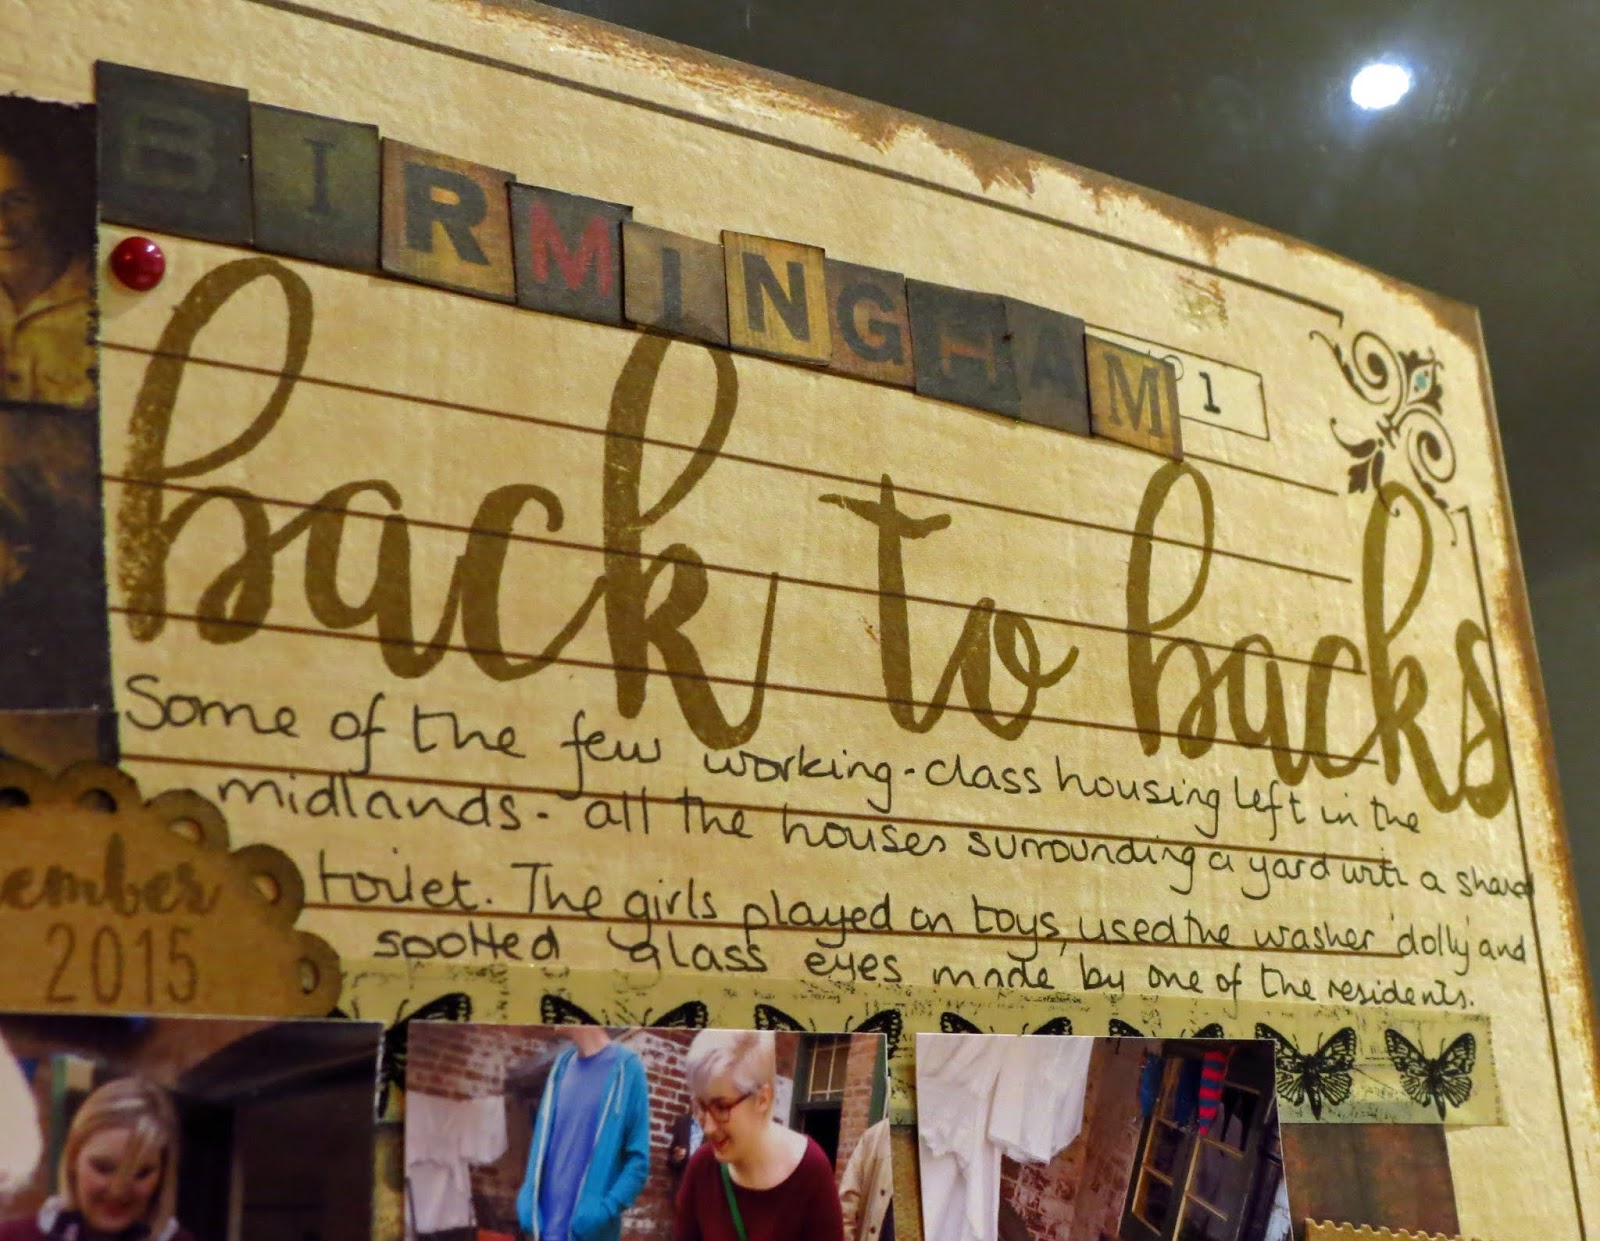
Back to Backs

In the centre of Birmingham is a yard surrounded by a series of Back to Back houses, one of the few left in the country.  There are not many working class homes left in Britain, so the National Trust have done a great job preserving the way of life of my ancestors.


We visited the yard during Open Heritage weekend back in 2104, the girls dressed up (as usual) and tried the games, washing dolly and sweets on offer.


I used Stamps by Me alphabet for the title, stamped direct to the page with a small amount of journalling underneath. The word Birmingham is cut from a Tim Holtz print block paper.


Many of the embellishments are also from the Tim Holtz range, the photos and die cut and coloured tickets, they all seemed to go so well with the theme of the layout. Old stash always comes in handy!

Tuesday, 27 March 2018

Another birthday layout

I made a second page about my eldest daughter's recent birthday, this time using a pair of silly photos.


Again I used one of the Clear the Scrap Desks prompts by Shimelle as inspiration.  The design is a 'shelf' with the photos, papers and embellishments sitting on top of it and the title and journalling hanging underneath.


The title is cut from funky foam using the Tim Holtz Deco XL die, the stamps are by Ali Edwards.


Most of the chipboard is by MME (Jubilee), and I finished the page with a 4x3" PL card and a scattering of sequins.

Tuesday, 28 November 2017

Wood slice backgrounds

One of my favourite issues of this year by Tim Holtz is the Wood Slice Bigz die and embossing folder.


 It has made some rustic style cards, but I can see it being really useful throughout the year. 


The die is a great match with an Xcut stag and wreath die set along with the winter greens.


The large Tim Holtz retro sentiment seemed to go well with the background too, so much so, it gave me an idea for my Christmas journal for this year- more about that later!


I also made use of the leftovers to my Christmas Journal from last year (Basic Grey), more cards coming up.


Tuesday, 21 November 2017

Stag Set of Cards

Lots of stamping on this set of Christmas cards.


The stamp and die set came with free with a magazine, and I liked them so much I decided to make a few cards using them.  The stag was stamped using Vintage Photo Oxide ink and cut out with the accompanying die.  I mounted it onto a shield shape, a Sizzix die.


I then cut a stitched circle from a nesting set, and drew lightly around it onto the die cut square card front.  Then I stamped the wreath over the circle, again using a variety of Oxide inks.  After mounting the stag's head over the wreath, I stamped a small sentiment and punched it out using an EK Success label punch.

Wednesday, 15 November 2017

More Christmas Cards


When I saw this 'Home for the Holidays' die set by Tim Holtz, I really wanted to make a few of my Christmas cards using it.

Die Set - Home for the Holidays - Click Image to Close

There are many pieces to the images. so they did take a while to make, but I loved the cards once I had finished them.


I varied where I put the sentiments, but kept the rest of the cards the same.


To give them a retro look I used wood grain paper for the sides of the cars to give them a real 50s feel.  I have saved one to go into my Christmas journal, after all, they took so long to make I did want to keep one for myself!

Saturday, 11 November 2017

Tim Holtz Mini Dies

I spent a Sunday die cutting gluing pieces of card to make these very cute little embellishments to add to both my cards and possibly my JYC later this year.


They did take a while to make, but I did think that (in the main) they were worth the effort.


The only one I would really not bother with was the candy cane, it was difficult to line up the small pieces so the canes didn't look great once made.  I would probably just stamp candy canes, far easier!

Wednesday, 12 July 2017

Water colour card

A friend of mine (another teacher) has been off work recently with stress; I made her a card to let her know I am thinking of her.


The background was coloured with glitter pens in rainbow order onto water colour card; I then took a brush of water and allowed the colours to blend together.  I used the water to move the paint around to make the moon.  The die cuts silhouettes are Wildflowers 2 by Tim Holtz, and the black heate embossed sentiment is by Altenew.  Teaching is a tough job... I should know. 😟

Tuesday, 16 May 2017

Gothic Splendour

Another page about our visit to Arbury hall here.  This one was made as part of the UKScrappers mini cybercrop, the challenge was to dig into the mountain of washi tape we all have!!


I used a Graphic 45 kraft background, and covered it with trips of washi in vintage shades, along with gold, green and blue. A strip of three photos cover much of the washi (but as I have so much, this didn't bother me!)


The original design called for us to die-cut embellishments (feathers) from washi covered card.


 I decided to use an Xcut die set of woodland tags from both kraft and the washi covered card.


I finished the layout using a Tim Holtx 'Spooky' 12" alphabet die, along with a banner underneath.

Thursday, 30 March 2017

New Tim Holtz Die Range

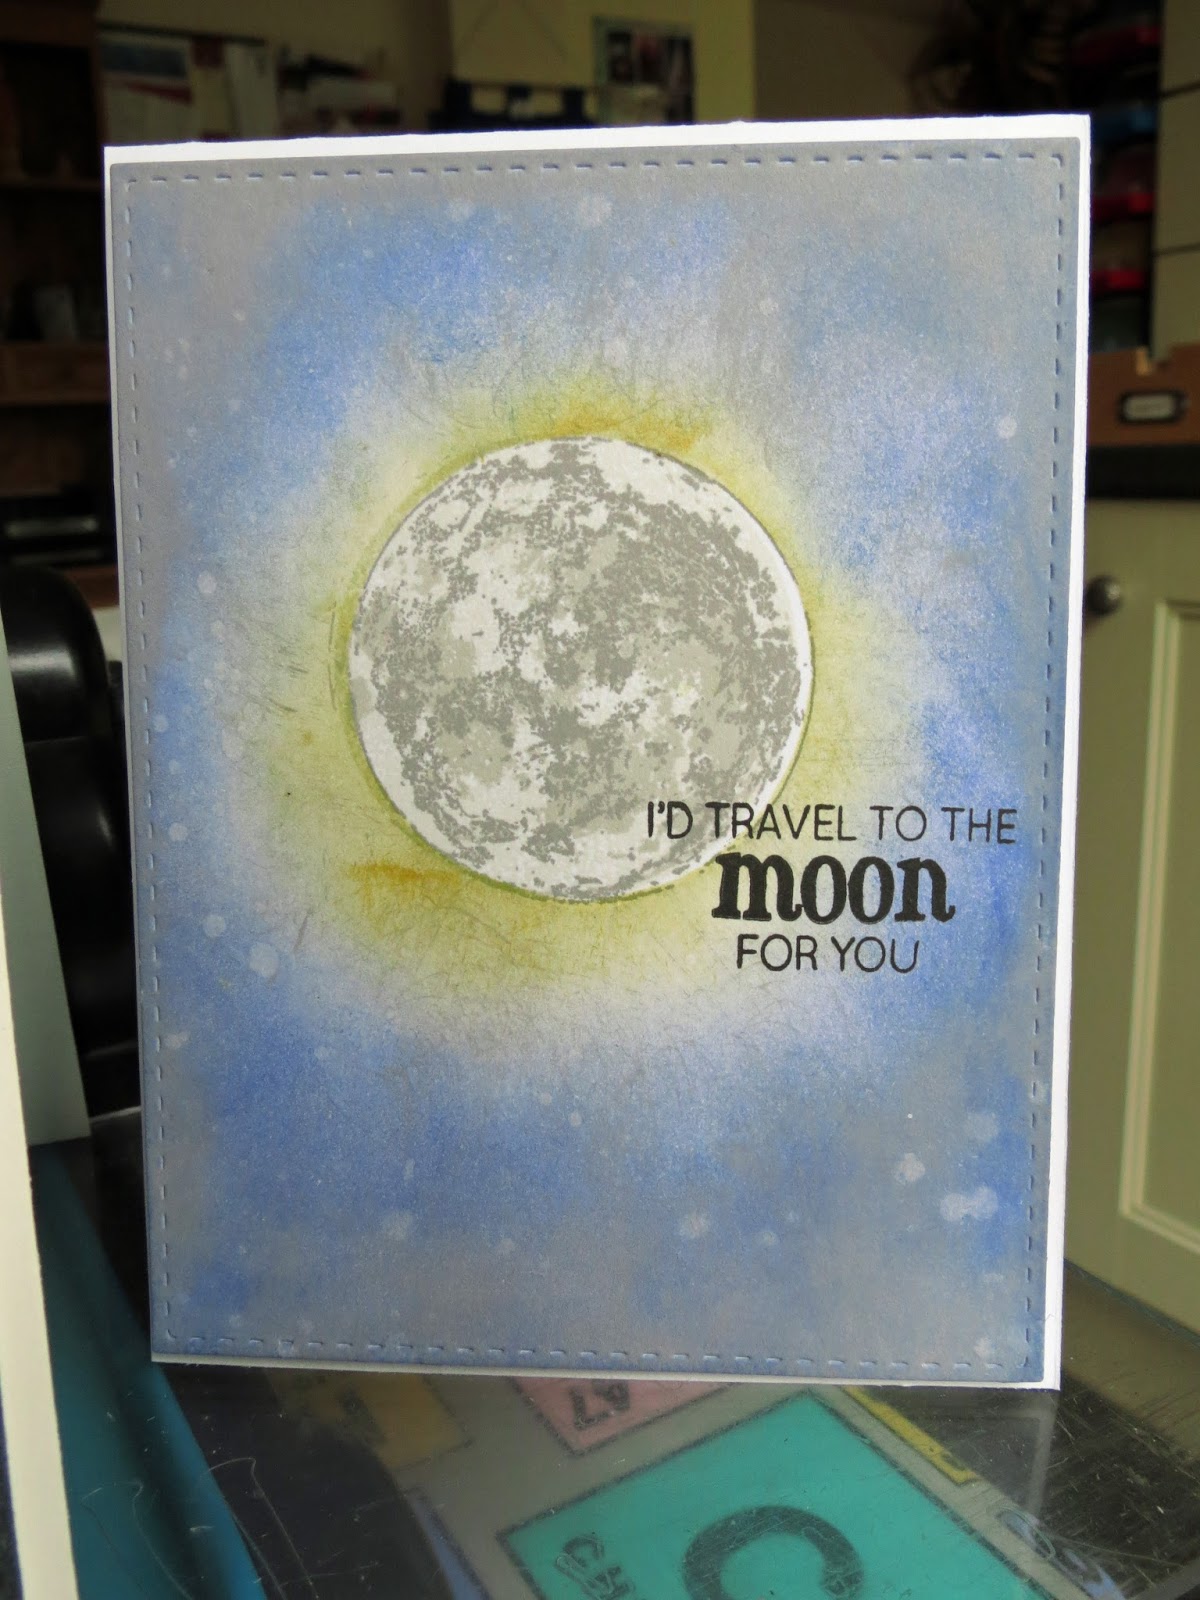
When I saw the new range of cityscape dies by Tim Holtz, I immediately had ideas about making use of them with my moon Altenew stamp set and distress inks, so this is where the inspiration for my cards came from.


I first stamped the moon shape onto some edge to edge Post it Notes and cut a couple out to act as masks.  After putting the masks onto white card, I gradually built layers of Distress ink onto the card, starting with yellow and red around the moon, then adding gradually darker shades of blue, grey and black soot to finish.  I splattered a little water onto the ink to redissolve it, taking off the excess with a paper towel to give the distressed look.  Finally, I removed the ink mask and stamped the moon in layers using the warm grey palette; all by Altenew.


Then it was time to add my foreground buildings.  I die-cut some from the Metropolis set, and others from the Skyline set. I added yellow card behind some of the buildings to look like lights in the windows.  I have to admit that the Skyline dies were far easier to use than the Metropolis set, some of the pieces were miniscule, and very fiddly to layer together.


They do look good, but I'm not sure if they are worth the time taken, I'll use the first card for my card to my husband on our upcoming Anniversary, so at least I know it will be kept, as I store cards I make for him (or those that the children make for me) in the pages of my scrapbooks.

Thursday, 9 March 2017

Rainbow Backgrounds

I have not been very well since Christmas, and have not even felt up to crafting much.  Most of the posts of late have been of things I made ages ago...my stash has been sitting on the kitchen table just making me feel guilty.

To help me to feel better, I was encouraged to take up making things again.  On the positive side, I had seen lots of demonstrations of techniques on the TV, and these cards made use of a very expensive set of pens  the kids bought me for my birthday last year, but had seen little use.  I saw Sheena Douglass show how to use them on water colour paper; she added a small stripe of ink from the red pen at the top, and then used water to move it across the top inch or two, then under it I added the next rainbow colour in the same way, and blended it into the first colour.  This carried on until reaching the bottom of the page.  Once the sheet dried, the glitter on the pens looks amazing; you can't really see it on the photos.

 Sheena showed how to make the moon by using water on a brush to move a circle of the paint away, making the clouds in the same way.  I loved the effect, so I made a few backgrounds and used them for card fronts, stamping onto and die cutting.


As the backgrounds are so sparkly, I kept the rest of the card pretty plain.  The flower silhouettes are cut from Tim Holtz wildflowers, and the sentiment is a docrafts one, heat embossed in white.  I used an anti-static bag before stamping, as the watercolour card can hold onto the powder in the wrong places, and my MISTI to overstamp on the rough surface a few times.


The sympathy stamp is (possibly) from an Altenew set... I thought it stood out well over the blue foreground.  My colleagues from work have sent me some lovely cards and flowers, so I hope to send these off in the next few days to show my gratitude before I get back to work in the near future.

Saturday, 18 February 2017

Stamping over Pigment Ink.

Half term is here, looking forward to some crafting time.
I still enjoy using Kraft cardstock, but colouring stamped images on Kraft can lead to a muddy looking outcome. A while back, I saw a video on YouTube which showed how to use pigment inks and a MISTI to solve this problem. So, I broke out lots of my old stamps and some pigment ink refills Anna Griffin) to make a range of cards.


I started on Kraft using Tim Holtz blueprint stamps.  I liked the telephones from the vintage set as I thought they could have a range of uses, so began with these stamps.

Then I made a few baby cards using this teddy stamp.


Next, I found a periodic table stamp. Being an ex chemistry teacher I bought it at a craft show ages ago. Sorting my stash back in December reminded me I had it!


As the chemistry stamp had tiny detail, it was difficult to stamp onto Kraft as it tended to bleed. Because of this, I decided to try stamping in this way onto Neenah card, lovely for clean images where the ink stays put.  They make lovely card fronts with a whole range of sentiments.
A good afternoon's crafting to fill up my card box.

Tuesday, 7 June 2016

Northern Lights

After playing with my ink blending for the moon cards I decided to have a go at the Northern Nights effect I had also seen online.  Lots of ink blending, but this time with brighter colours, and toned down with blue and black on top made the background for this card.  I flicked water onto the inks to reactivate them, and then used an old dry toothbrush with acrylic paint (white) to flick a few bright stars to finish the look.


A simple stamp of a cityscape (Seattle) and label stamp for the sentiment, cut out and mounted onto foam completed the card.


I really love how this card turned out, the red is a little bright, but the city overstamped looks great.

Friday, 3 June 2016

Starry, starry night


After buying a set of Altenew stamps called with a large moon, I went online to see how they could be used. Craft Bunny on Youtube had some fabulous ideas, so I used them to inspire me.


The moon image itself overstamps beautifully (and so easily) using shades of grey ink, and after masking I used a variety of distress inks to blend together and make the background.


After flicking them with water to reactivate the inks and give a blotched appearance, I stamped on sentiments to finish the cards.


Finally, I added star shaped sequins from my stash.

Friday, 31 July 2015

Finished at Last!

We were some of the latest schools to finish this summer, only ending term on Tuesday.
A few people moved on from our place, some to new jobs, others retiring.


My own TA didn't leave our school, but she has switched years to work lower down the school, which is a pity as I have really  enjoyed working with her. I made her a card to say thanks for all the help she has given to me and the children over the past three years.


The sentiment is a Tim Holtz embossed and sanded one, a new purchase! Paper is a very old Graphic 45 one.  Looking forward to a rest (after the decorating is done).

Sunday, 8 June 2014

Happy Birthday

to my husband.


 51 today, another year closer to retirement is how I see it!

I used a mix of Papermania Mme Payraud and Tim Holtz Laboratorie papers, they go together so well!

Friday, 27 September 2013

A Page for my Scrapbook

When I manged to get a place on the Tim Holtz workshop back in August, I knew the memory would be one I would have to scrapbook.

And that's the reason I asked for a photo with him :), for my scrapbook page!

I moved away from his grungy style for a brighter look, using Amy Tan Sketchbook papers.  The title is part stamped using a really old retro looking set by MME, and I cut out plenty of images from the papers to add embellishments, and a chevron border.


 I couldn't make the layout completely graphic in style, so a few ink drops messed the background a little...


 ... and a twirl of baker's twine under the title to finished off the layout.

Friday, 30 August 2013

Inspired

Well, I did manage to pick up my lovely paper pack, and had a morning being inspired by Tim Holtz.

He is a really good teacher, well prepared and explained everything a step at a time.  i came away knowing how to make better use of the ranger things I already have, and with an almost completed vintage mini book about my ancestors.  I then spent the afternoon completing my book, and here it is in all its glory!

The cover has the lumpiest embellishments and a belt style fastening.

Inside I used little photos of family members, flip up pages added to embellishment spaces.

Some mini pages flipped left to richt, hinges were made with tissue tape.

Backgrounds were made using distress stain, inks and masks.

Strange to think it stared as a little bag of ribbon and embellishments and a handful of manilla tags.
I even chopped into my new papers for the final pages with a photo of me to include some science references!
I'm not one to gush, but I did come away feeling inspired, and thinking about using my stash in a new way!